
Identifying the Source of a Leaking agitator seal
Common Signs of Seal Failure
Spotting signs of seal failure early on can prevent costly repairs and operational downtime. Start by checking for visible leaks around the agitator seal area, which might manifest as puddles of fluid underneath the unit, illustrating classic leaking agitator symptoms. Pay attention to any unusual noises such as grinding or high-pitched squealing, indicating possible wear on the seal or its surrounding components. It's also crucial to monitor the pressure for fluctuations or irregular performance of the agitator, as these issues often signal a seal breakdown.
Tools for Diagnosing Leak Severity
Understanding the severity of a leak is pivotal for effective repair and maintenance strategies. Pressure gauges are invaluable; they measure seal performance under operational conditions, offering a quantifiable assessment. Infrared cameras are effective tools to identify temperature variations caused by escaping fluids, helping pinpoint the leak source. Additionally, vibration analysis tools provide insights into the operational integrity of the agitator, enabling the detection of potential failure points in the seal, helping diagnose seal leaks.
Differentiating Seal Leaks from Other Equipment Issues
Distinguishing seal leaks from other equipment problems is crucial for accurate diagnosis and repair. Check for other potential issues such as housing cracks, or faulty gaskets, which can mimic seal failure symptoms. Reviewing the installation history ensures the seal was fitted correctly and matches the equipment specifications. Performing a comprehensive inspection can help decouple seal leaks from unrelated mechanical failures that might also cause fluid to escape. Properly differentiating these issues can save time and prevent unnecessary repairs.
Step-by-Step Guide to Fix a Leaking Agitator Seal
Shutting Down Safely for Repairs
Ensuring a safe shutdown before beginning repairs is crucial to prevent accidents. First, follow lockout-tagout (LOTO) procedures to make sure the equipment is completely shut down and cannot be accidentally restarted. This is critical to worker safety. Next, remove or carefully contain any hazardous materials in the area to avoid exposure during the maintenance process. Lastly, familiarize yourself with the manufacturer's safety guidelines, which may offer additional tips for mitigating risks associated with sudden fluid release. These steps form the foundation of a safe repair process.
Disassembling the Agitator System
Disassembling the agitator system requires precision and care. Begin by documenting the assembly sequence using photographs or notes; this will ensure a smoother reassembly process. Use appropriate tools that won't cause damage to the components or surrounding equipment while you carefully remove the agitator parts. Once disassembled, inspect each component for signs of wear and tear, identifying parts that may need replacement during reassembly. This step-by-step approach to disassembly ensures that you can efficiently troubleshoot and address any underlying problems.
Replacing Damaged Seal Components
Replacing seal components is a critical part of repairing a leaking agitator. Start by selecting high-quality replacement parts that match the specifications of the original equipment manufacturer (OEM). It's vital to ensure that all interfaces are clean and debris-free to secure a proper fit and an effective seal during installation. If necessary, apply a suitable sealing compound following technical guidelines to reinforce the new seal. This careful process prevents future leaks and enhances the durability of the repair.
Reassembly and Pressure Testing
The reassembly process is as crucial as the disassembly. Follow your documented notes and photos, reversing the disassembly steps to ensure each component is properly aligned and securely fastened. Once reassembled, perform a pressure test to verify the integrity of the new seal. Meticulously note any leaks during this test and document the results for future reference. This careful approach not only assures the quality of the repair but also provides valuable insights for optimizing future maintenance efforts.
Preventive Maintenance to Avoid Future Leaks
Routine Seal Inspections
Establishing a routine seal inspection schedule is crucial for preventing leaks and sustaining optimal performance in agitator systems. This routine should be specifically designed, considering the operational demands and usage patterns of the equipment. Incorporating both visual checks and functional tests into the inspection process allows for early identification of wear and potential failures. This proactive approach can significantly prolong the seal's lifespan by addressing minor issues before they escalate. To enhance this preventive strategy, utilizing condition-monitoring technology offers predictive insights which can foresee failures, reducing downtime and repair costs accordingly.
Proper Lubrication Practices
Implementing proper lubrication practices is key to maintaining seal integrity and preventing leaks. The lubricant used should always adhere to the specifications provided by the manufacturer to ensure compatibility and efficiency. Equally important is adhering to a regular maintenance schedule for lubrication checks, adjusting levels to secure optimal performance. It's vital to avoid over-lubrication, as excessive lubricant can cause seal fatigue, potentially leading to premature failure. By diligently managing lubrication practices, you can enhance the overall longevity and performance of both the seal and the system.
Monitoring Nitrogen or Barrier Fluid Levels
Monitoring nitrogen or barrier fluid levels is essential for maintaining seal systems and preventing leaks. Keep comprehensive records of these levels and establish minimum thresholds to avoid seal failure, thus safeguarding system integrity. Maintaining the correct pressure within the seal system is pivotal for optimal operation, which effectively prevents leaks. Regular assessments of the barrier fluid quality are necessary to avoid contamination; chemical reactions due to impurities in the fluid can damage the seal, crippling its effectiveness. Following these guidelines can help maintain system stability and prevent costly and damaging leaks.
Troubleshooting Persistent Leaking Issues
Addressing Shaft Runout Misalignment
Persistent leaks in agitator seals can often be traced back to shaft runout misalignment. Utilizing precision measuring tools is crucial to accurately assess the alignment of the shaft and associated components. By doing so, we can identify deviations that may be contributing to leakage. Once identified, adjusting or realigning the shaft is a necessary step to rectify these misalignment issues and restore seal integrity. It's important to refer to manufacturer guidelines on alignment specifications to ensure that adjustments comply with industry standards and maintain performance integrity. Proper alignment not only addresses leaks but also enhances the overall operational efficiency of the equipment.
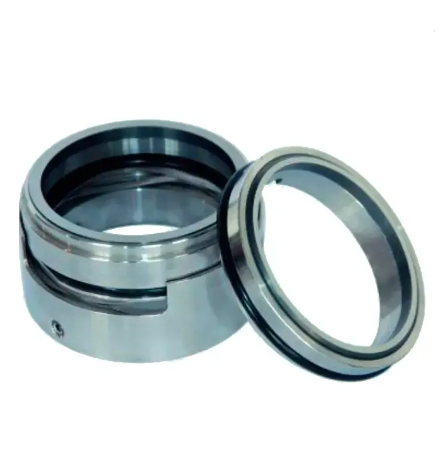
Resolving O-Ring Degradation
O-ring degradation is another common culprit behind leaking agitators. Regular inspections are essential to identify signs of wear, cracking, or hardening that compromise the O-ring's functionality, leading to leaks. When degradation is detected, replacing the O-rings with suitable replacements that are compatible with the operating environment and fluid types is imperative. Incorporating regular checks of O-ring health into preventive maintenance routines ensures early detection of deterioration, thus preventing potential seal failures. By maintaining the condition of O-rings, we can enhance the longevity of the sealing system and reduce downtime.
When to Consider Professional Repairs
Deciding when to bring in professional help for agitator seal repairs involves evaluating the severity of the leak and the overall system performance. If attempts at troubleshooting and maintenance fail to resolve the issue, consulting with experienced technicians who specialize in agitator seal repairs becomes necessary. Understanding the cost/benefit analysis of hiring professionals versus attempting in-house repairs helps in making informed decisions. While professional repairs might seem costly upfront, they often save time and resources in the long run, ensuring reliable and long-lasting seal solutions.
FAQ Section
What are the signs of agitator seal failure?
Signs include visible leaks, unusual noises, and pressure fluctuations or irregular performance.
What tools can be used to diagnose the severity of a seal leak?
Tools include pressure gauges, infrared cameras, and vibration analysis tools.
How can I differentiate seal leaks from other issues?
Perform checks for housing cracks, faulty gaskets, and review the installation history to distinguish seal leaks from other equipment problems.
What steps are involved in safely repairing a leaking agitator seal?
Follow shutdown procedures, safely disassemble the agitator system, replace damaged components, then reassemble and pressure test the system.
How can preventive maintenance help avoid future agitator seal leaks?
Engage in routine seal inspections, adhere to lubrication practices, and monitor nitrogen or barrier fluid levels.
When should professional repairs be considered?
When troubleshooting and maintenance attempts fail to resolve the issue, professional repairs should be considered.
Table of Contents
- Identifying the Source of a Leaking agitator seal
- Step-by-Step Guide to Fix a Leaking Agitator Seal
- Preventive Maintenance to Avoid Future Leaks
- Troubleshooting Persistent Leaking Issues
-
FAQ Section
- What are the signs of agitator seal failure?
- What tools can be used to diagnose the severity of a seal leak?
- How can I differentiate seal leaks from other issues?
- What steps are involved in safely repairing a leaking agitator seal?
- How can preventive maintenance help avoid future agitator seal leaks?
- When should professional repairs be considered?